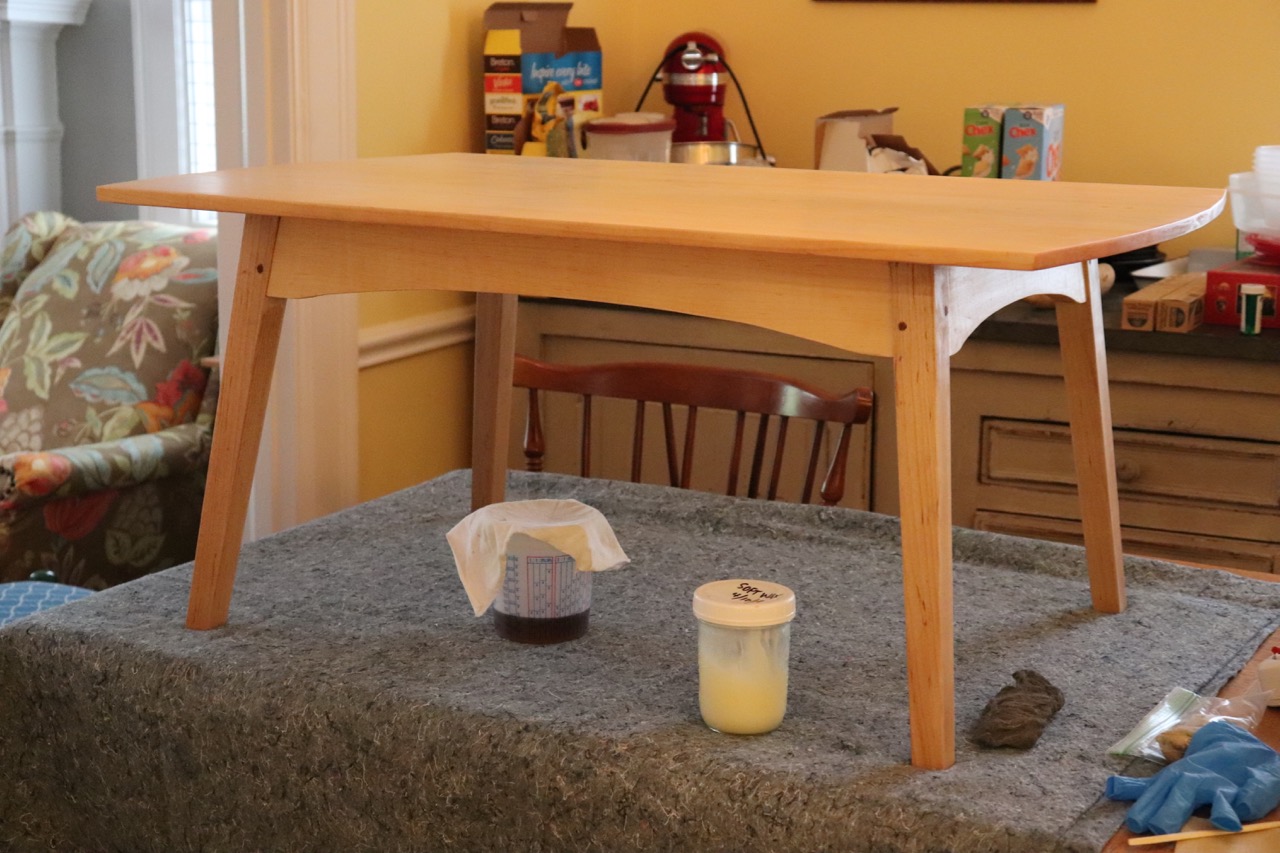
This week I am finishing my splay-legged coffee table… in the dining room, because the humidity is such that I don’t trust oil to dry in the workshop. I will have more to say about (and better photos of) this piece, which posed several, ah, interesting challenges, but for now let’s talk about this one, which I’ve faced before and will face again: constructing small arcs of large circles.
There are three long arcs of circles on this table, at the ends of the top and on the undersides of the aprons. The longest has a lengths of 23 inches and height of 1 inch — a radius of some five feet, so actually constructing the circle was straight out. I could probably have drawn the shortest one freehand to within sawing and shaving tolerances, but the longest moves so slowly that I didn’t trust myself. I’ve been known to use Affinity Designer (Adobe Illustrator for people without corporate budgets) to draw ogees when I couldn’t get what I wanted with French curves, but I can’t print something 23" long. What to do?
What George Walker and Jim Tolpin call artisan geometry has solutions for practically every design problem woodworkers face, including this one. What you do, is draw a half-circle with the height of the arc you want, then proportionally expand that arc using station points, from which you can build a form for bending a batten or simply sketch a template:
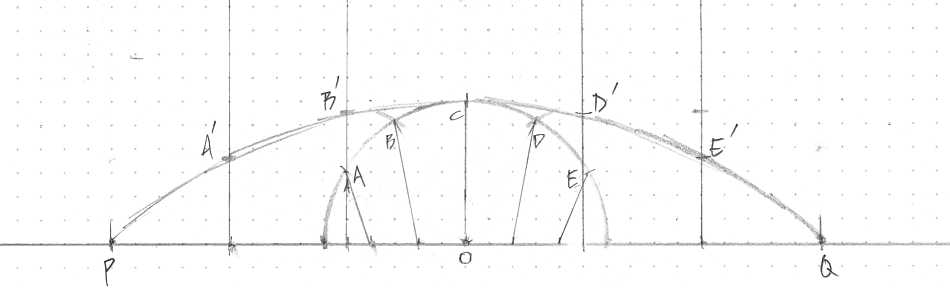
But while this method works well for doubling or tripling the length of the arc, it isn’t really practical for stretching it by a factor of twelve.
Finally, like all good craftsmen, I fell back on the training I received as a young apprentice: I used trigonometry. Knowing the length and height of an arc one can, using trigonometry, determine the radius of the parent circle, then plot coordinates of station points in terms of the horizontal distance from the center of the baseline and the height of the arc at that point. Of course, one doesn’t want to have to do those calculations thirty-odd times for a single project, so I wrote a bit of code to do it for me. And since I assume other people have similar challenges, I made the calculator available on my website.
To use the calculator, input the width and height of your arc, the horizontal interval (along the baseline) between the points you want to plot, and the desired precision. The coordinates will be generated in ordinary fractions of an inch, to the desired precision (up to 1/64 inch). If desired, you can also see decimal values.
A calculator for constructing small arcs of large circles
If you want to understand the math, my explanation follows.
The math

For a point P on an arc, define x as its distance along the chord from the center and y as its distance from the chord. Given x, how do we find y?
If we’re given the width w and height h of the arc (as is common in laying out furniture), we first need to calculate the radius of the circle r. To do this, note that
w = 2rsinθ
and
h = r – rcosθ
where θ is half the angle of the arc.
Solving for sinθ and cosθ we get
cosθ = 1 – h/r
By trigonometric identity, we know that sin2θ + cos2θ = 1. Therefore,
w2/4 + r2 – 2h/r + h2 = r2
and solving for r we get
r = (w2 + 4h2)/8
(For our purposes, we don’t need to know θ, but calculating it at this point would be trivial.)
Now, for any point P on the arc, to find y given x, define φ as the angle of the arc from its center to P (see diagram). Then
x = rsinφ
y + (r-h) = rcosφ
Given x, we can solve for φ and then for y:
φ = sin-1(x/r)
y = h – (1-cosφ)r
As a rule, I’d much rather use pencil-and-paper constructions, but it’s a craft, not a religion, and sometimes the old ways are best. “Old” being relative to the craftsman’s education. If, however, you want to use this new-old-fangled artisan geometry, I recommend you buy Walker and Tolpin’s book By Hand and Eye, which is really excellent.